
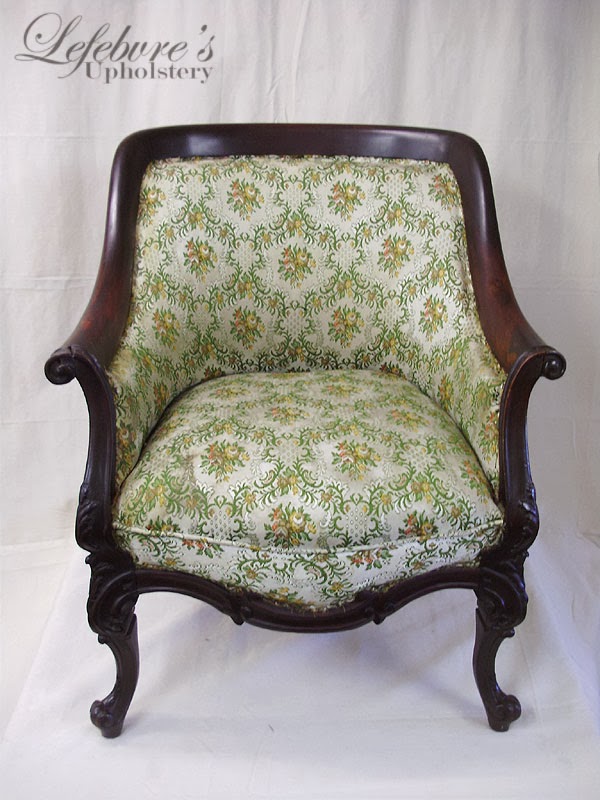
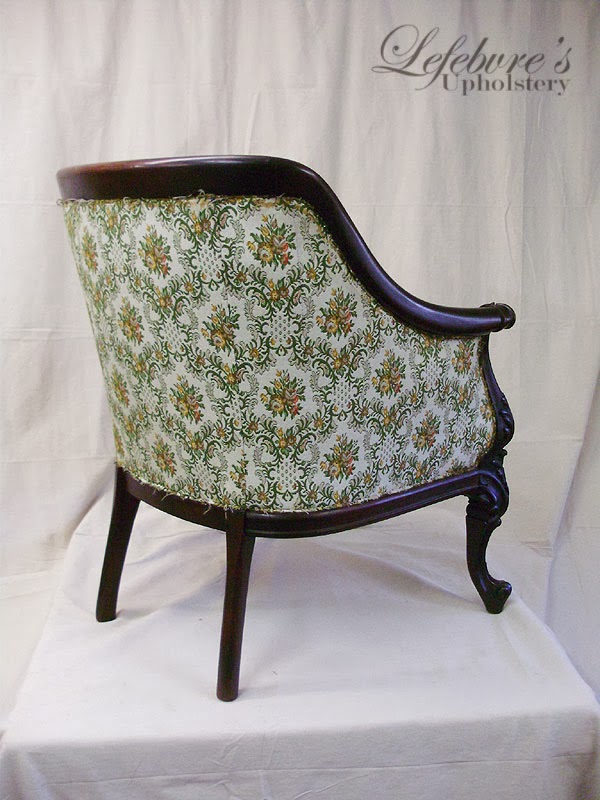
The chair arrived to us at the shop in fairly nice shape, but with dirty and worn fabric, and with both front arm scrolls badly broken (and poorly repaired). The chair had a decorative edging (piping or gimp) but it was missing from the chair, which made it look even more rough. We could tell it was going to be a lot of work, but we didn't quite expect to have this much work to do on this chair initially (as you'll see).
The chair "as received":
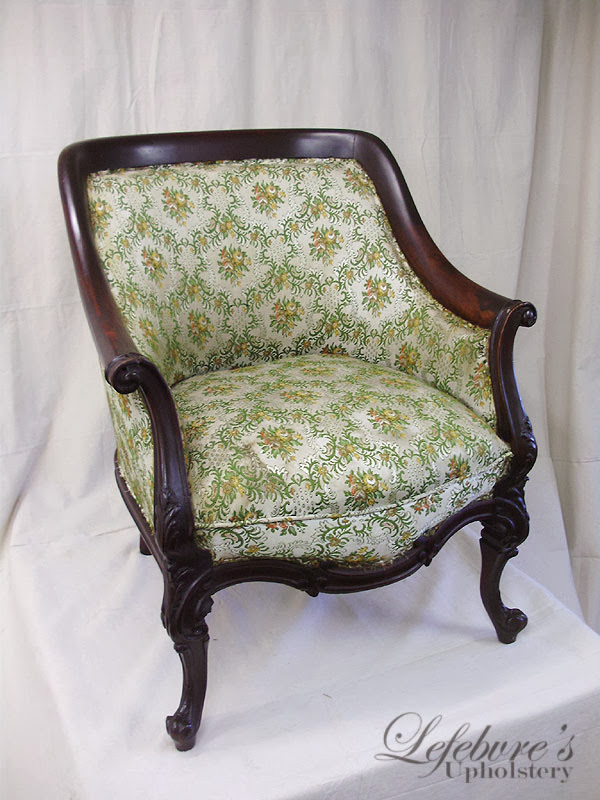

Right Arm:

Left Arm:
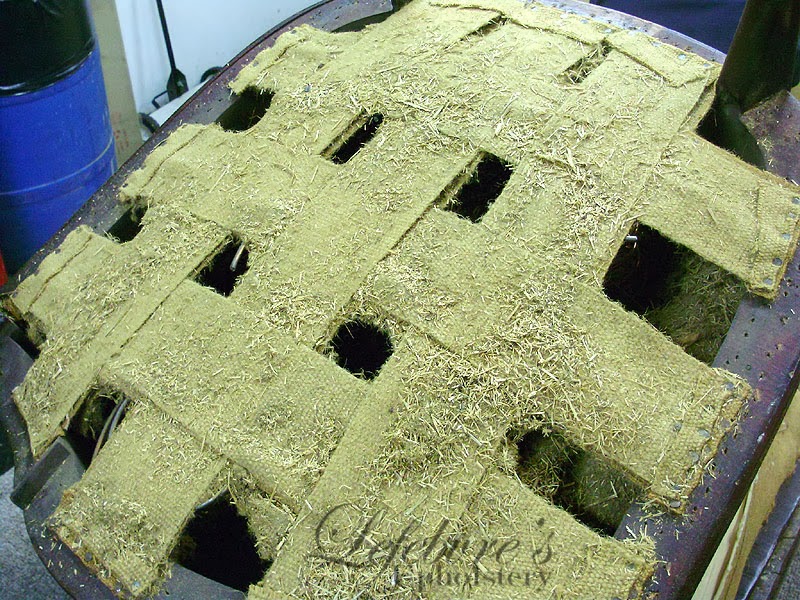
As I pointed out earlier, the chair didn't seem to be too bad, up until we started to strip it down. One of the first discoveries was on the bottom. As you can see from the following photo, the webbing (straps) have been doubled-up in an attempt to re-stiffen the chair bottom, and you can also see a LOT of straw dust, which tells you that the stuffing has started to fall apart.
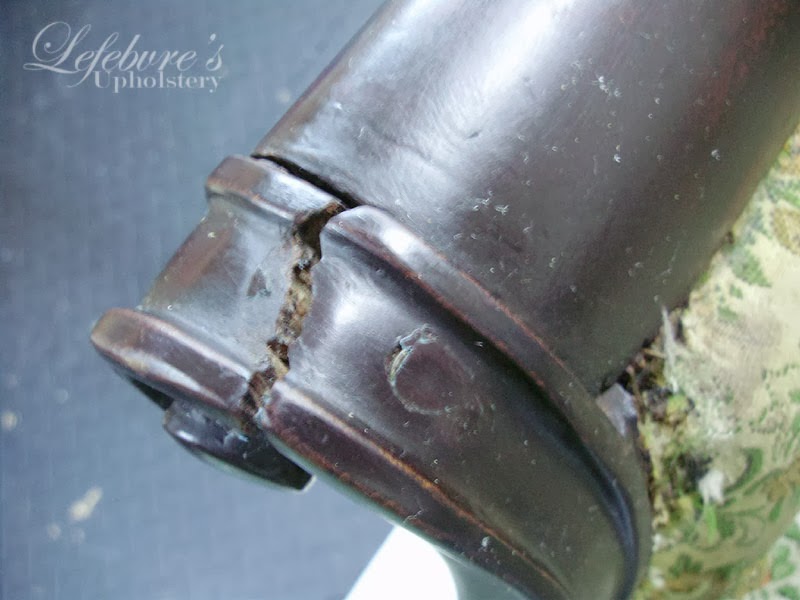
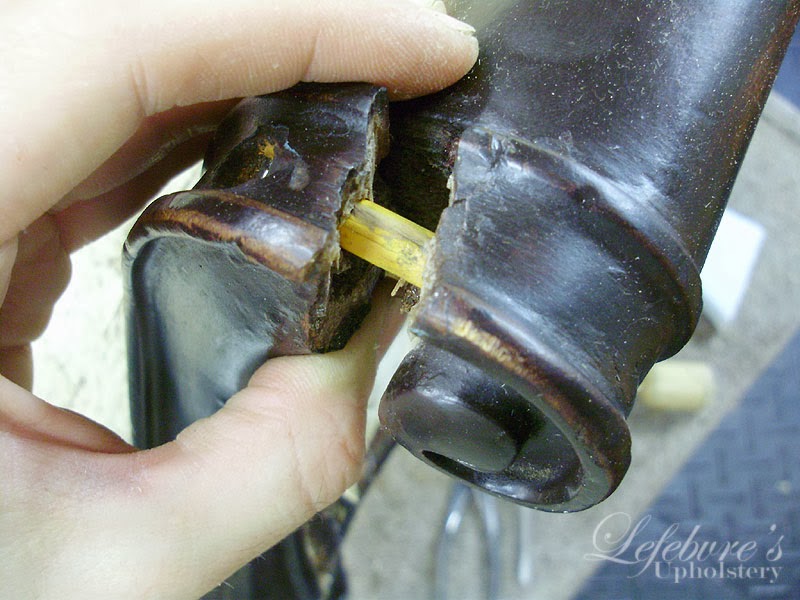
We also found that on top of the awful screws, the right arm had been repaired with a yellow number 2 pencil. What an awful repair. How is glue supposed to stick to the yellow paint? Are wooden dowels that expensive? Repairs like this on such a beautiful chair are a sad sight to see.
Chair partially stripped.

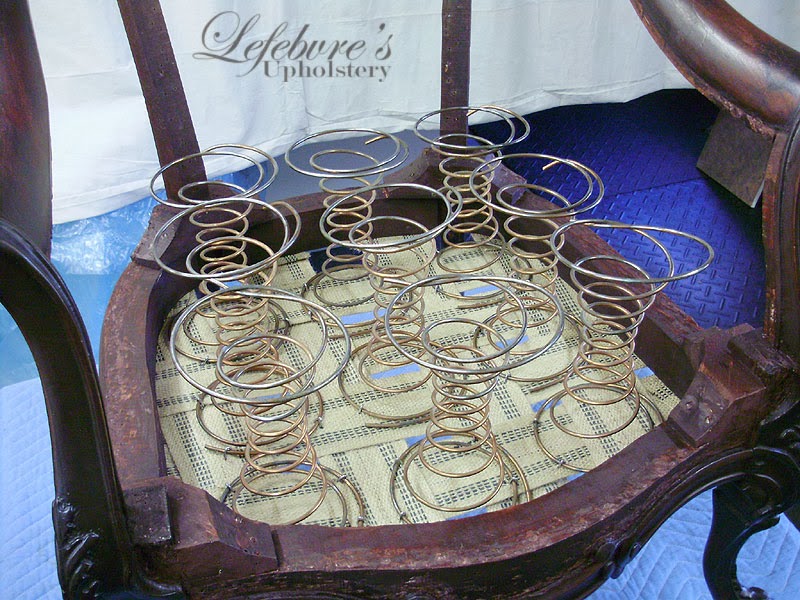
The springs themselves were fine, but all the ties were completely finished (meaning that all of the springs need to be taken out and re-tied.

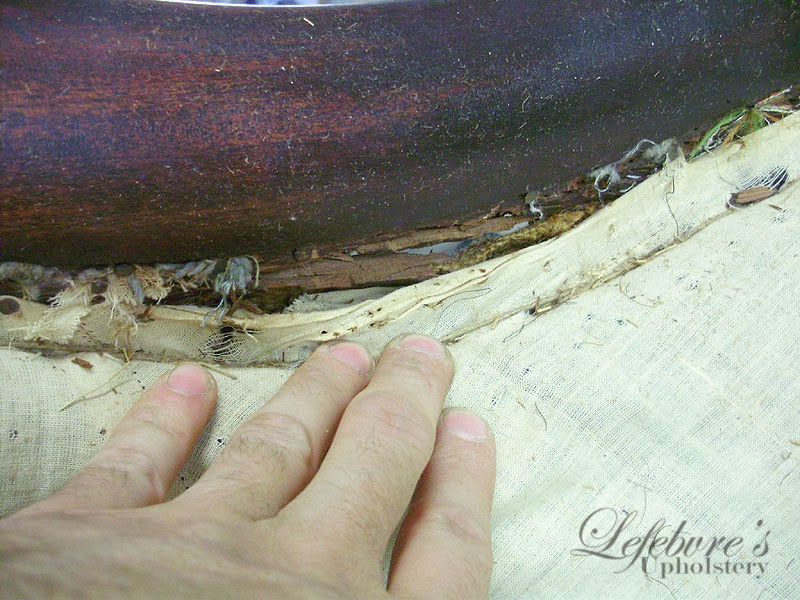
More and more structural issues were found in the frame. Here you can see that all the glue blocks are unglued, on top of all the burlap, which is torn and falling apart.
Left side:

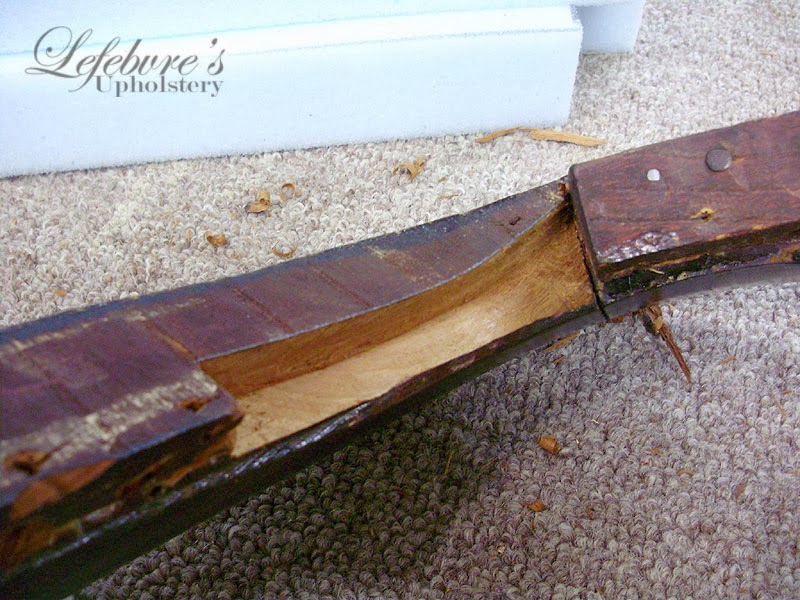
The other side was equally bad (Right side). The moulding along the bottom of the chair was also unglued and missing a chunk. This was likely a "factory goof" where the moulding was cut too short, but it originally had a patch which has fallen out and been lost.

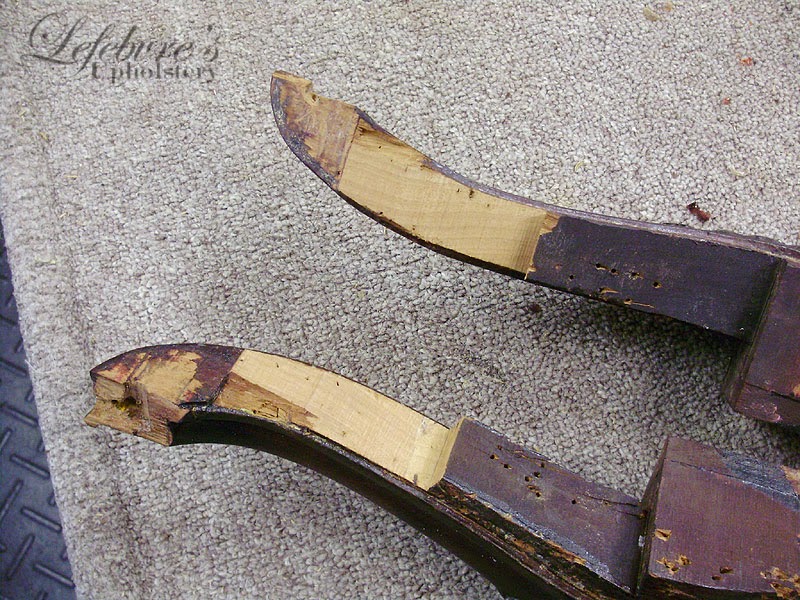
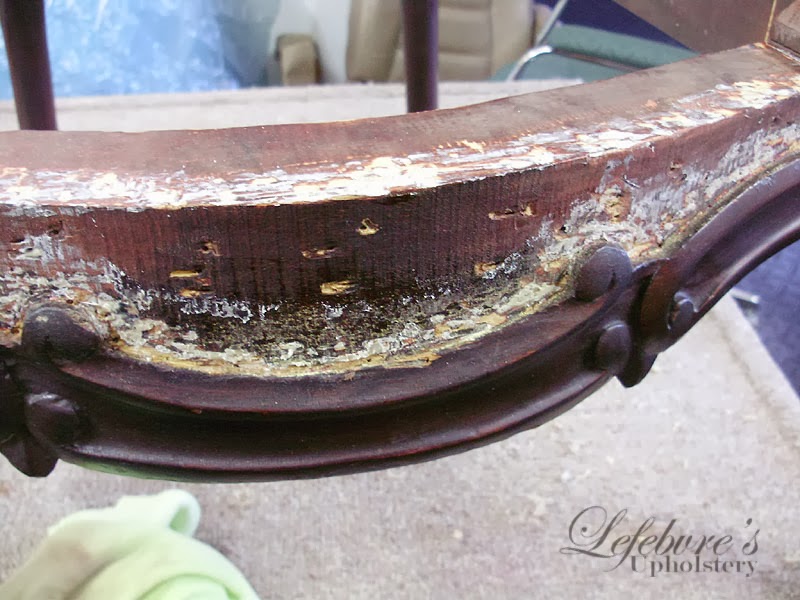
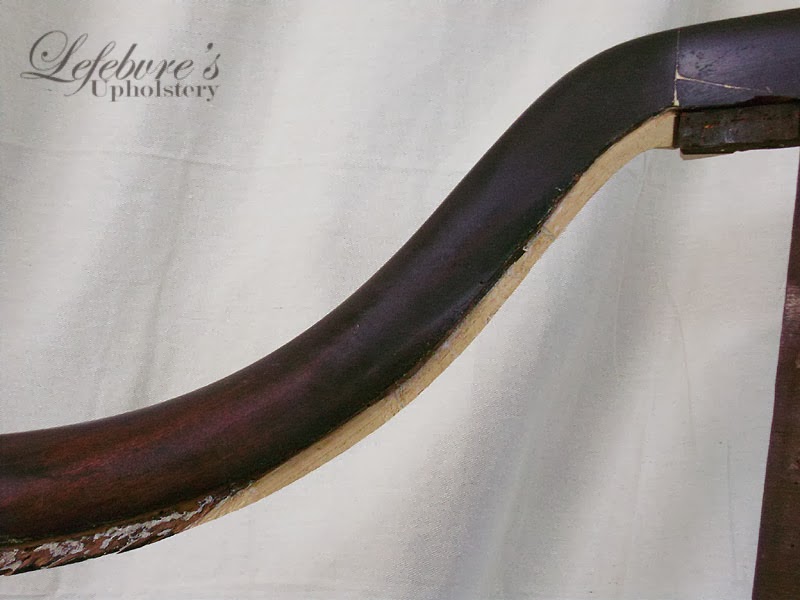
One of the major issues was that the curved arms at the top of the chair were severely damaged along the edges. There was literally no wood left to tack our stuffing and fabric to.
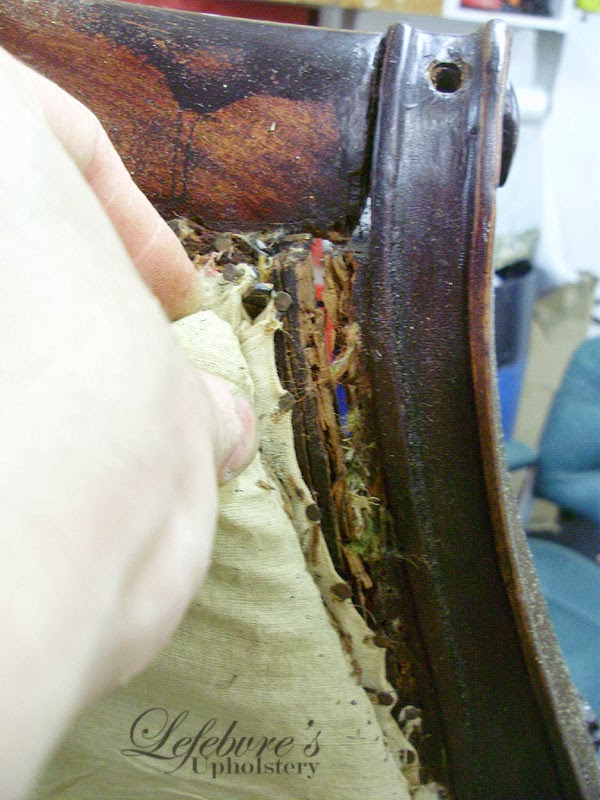

These problems were caused by two things: number one is the grain direction, which is weak along the curve (especially on mahogany, which is a bit soft), and secondly, the bulk of the damage is from multiple upholstery jobs over the years. The sheer number of tacks put in and removed over time has really turned the wood into Swiss cheese. The only way to repair this is to patch and repair the wood, which was a LOT of work.
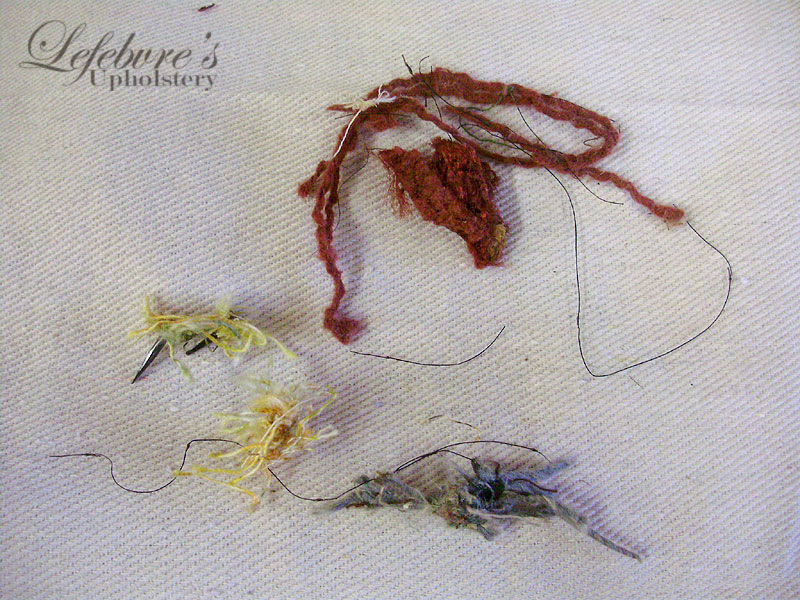
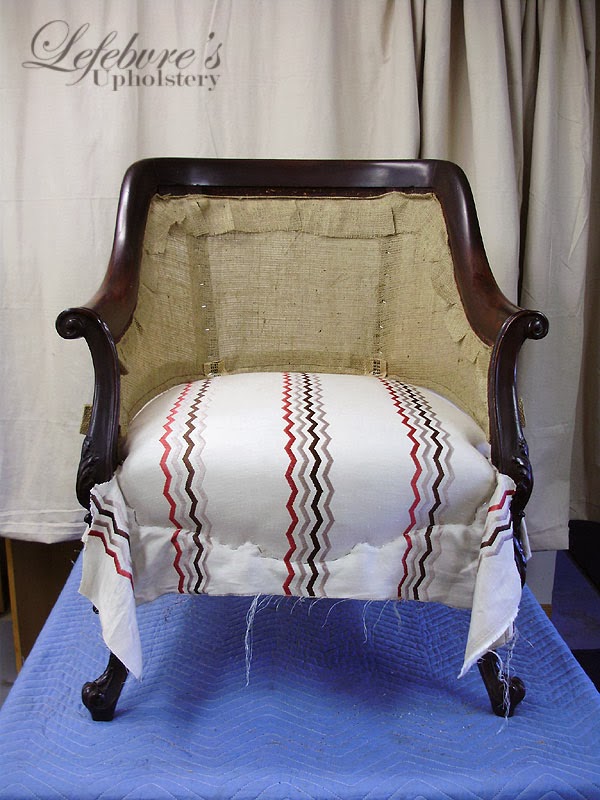
During the stripping-down process, we uncovered traces of at least 3 previous fabrics (on top of the white patterned fabric above). A burgundy, yellow (patterned), and light blue:
We stopped at this point, and called our client to tell her the bad news, and find out if she wanted us to continue with all the additional repairs, which would necessitate the complete dis-assembly of the chair frame, and several (complicated) wood repairs.

After confirmation, work continued on the chair. The upper back stuffing was removed, and the frame was gently knocked apart. Here you can see the front legs with worn sections cut away. We only removed the really bad sections to preserve as much of the original material as we could.
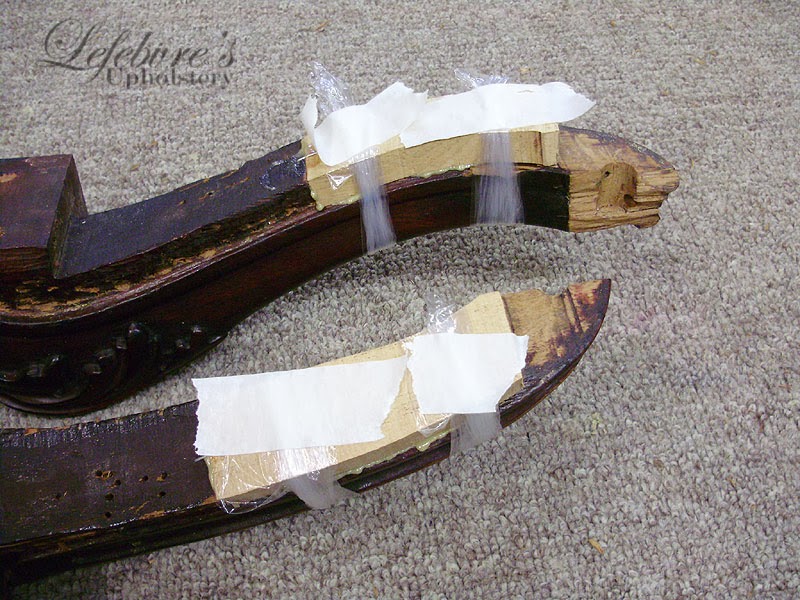
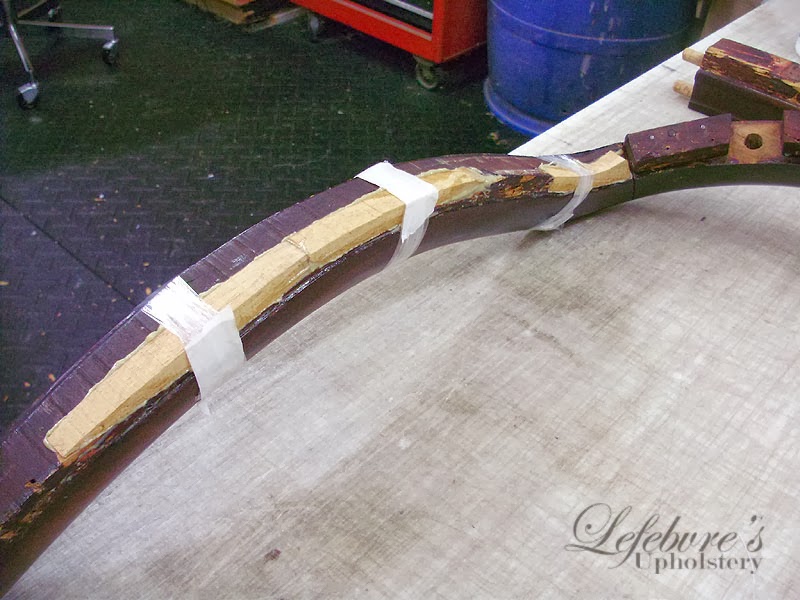
New mahogany patches were carefully cut, sanded, shaped, and fitted for each patch.

For the front legs, we were able to use the band saw to cut away the bad sections, but for the curved arm rests, we couldn't do this because of the complicated curves and angles, so all the patches had to be carefully hand carved. These repairs took an entire 8 hour day to complete.

The two most complicated patches were the two inside corners, which were both kind-of a banana curved shape.
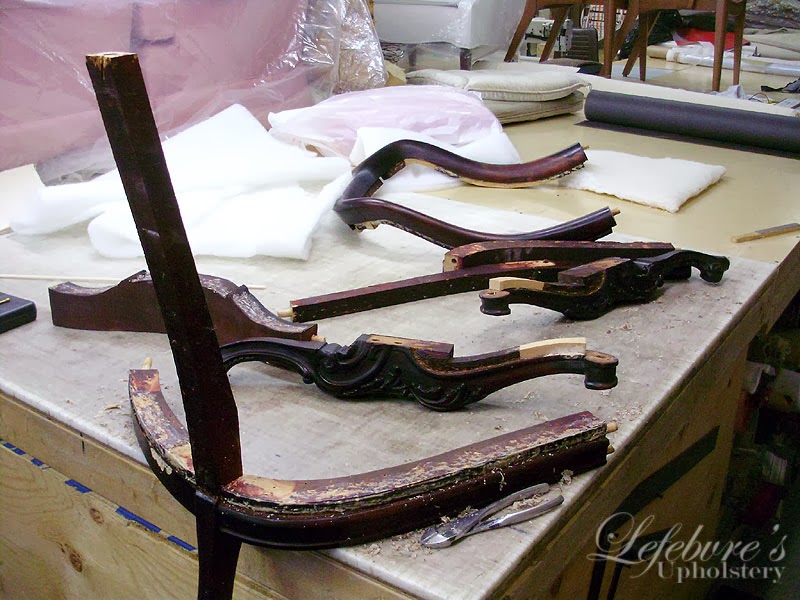
Front legs:
Underside of left arm:

Underside of right arm:
Chair pieces:
After many hours, the chair frame was reassembled.

All of the tack holes in the frame along all the edges were filled.
Repaired and patched right and left arms:

Frame repairs before staining:


Moulding repair:

Frame after all the repairs were done, stained, and touched-up.


Now was finally time to start putting the chair back together. Here we see the new webbing and springs.
8-way hand tie.

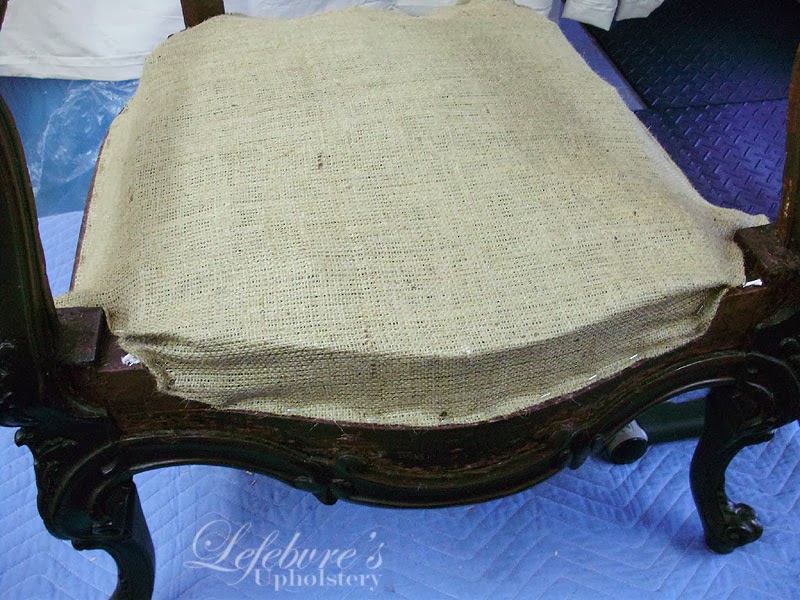
New burlap cover.
After the new burlap, we re-installed the original straw-stuffed edge roll, re-stitched that in place, then re-applied the original straw and horse hair stuffing, which was then topped with cotton and a muslin top cover.

New fabric. The owner wanted a more modern look for the chair, and she chose this zigzag fabric with a coordinating deep maroon for the exterior.
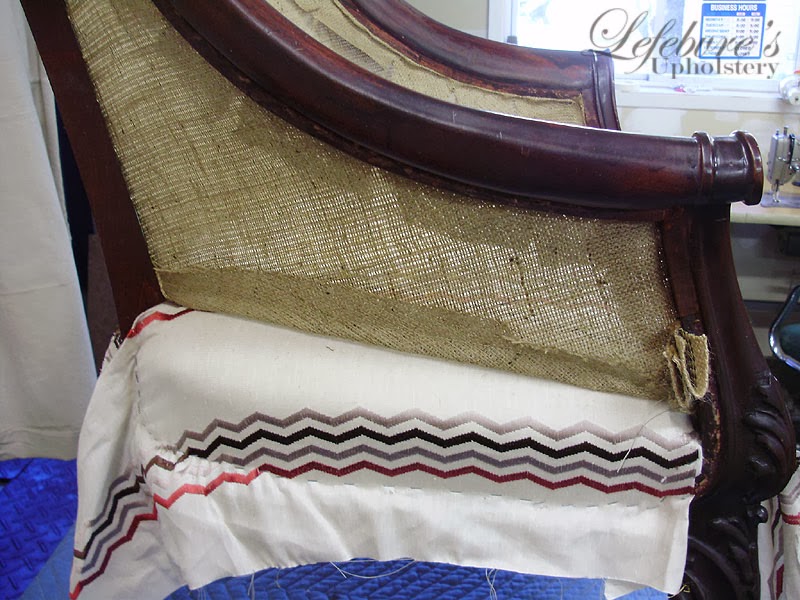
Back stuffing re-installed, along with the new muslin cover, and top fabric. We had to make new patterns for these pieces since the originals were not the correct shapes to properly fit the curve.

Exterior fabric.

And finally, the finished chair. This is a truly stunning piece of furniture.

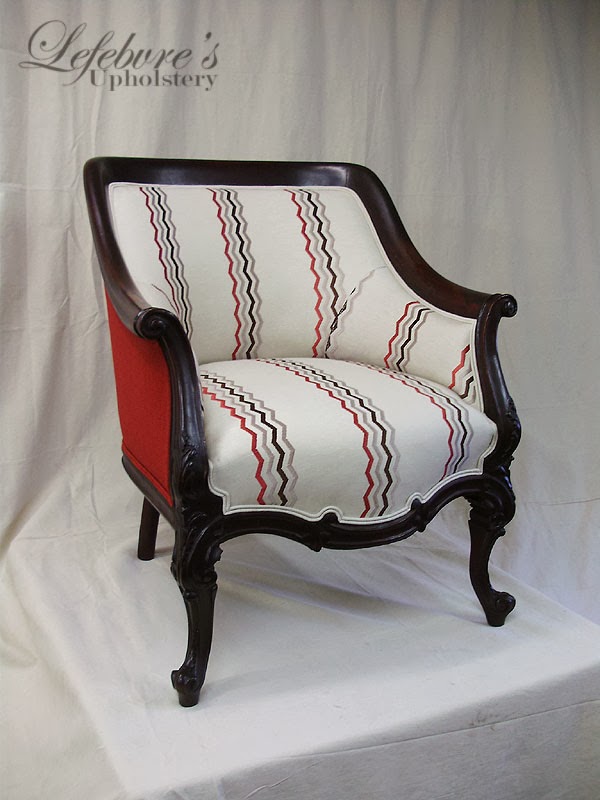


I really love this red.


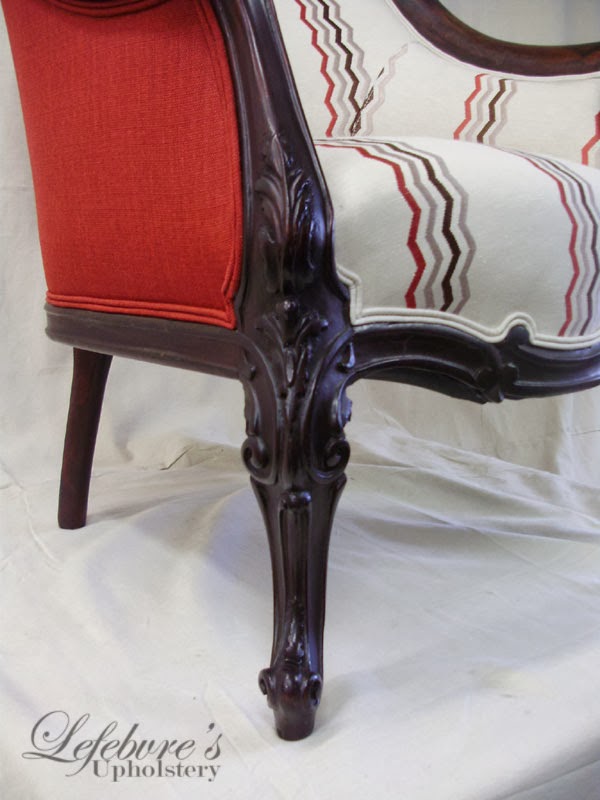
A detail showing the beautiful hand carved mahogany legs, and the piping.
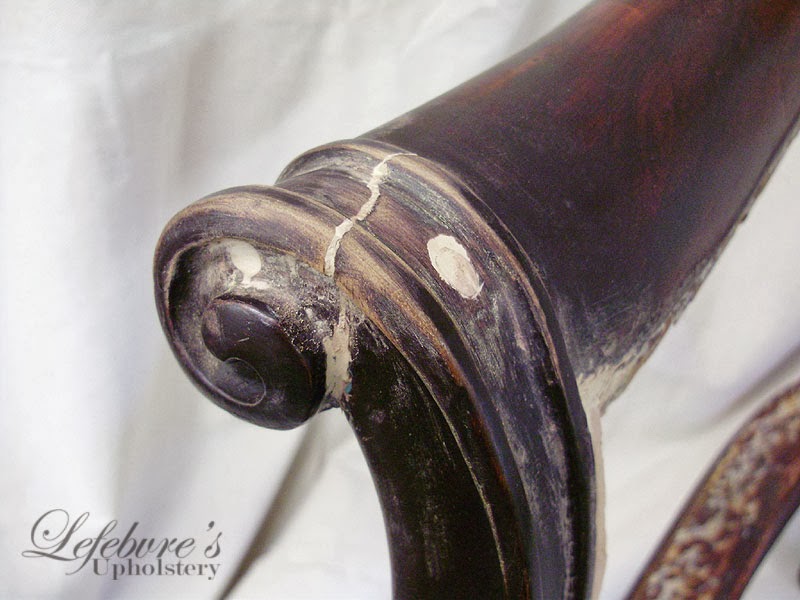
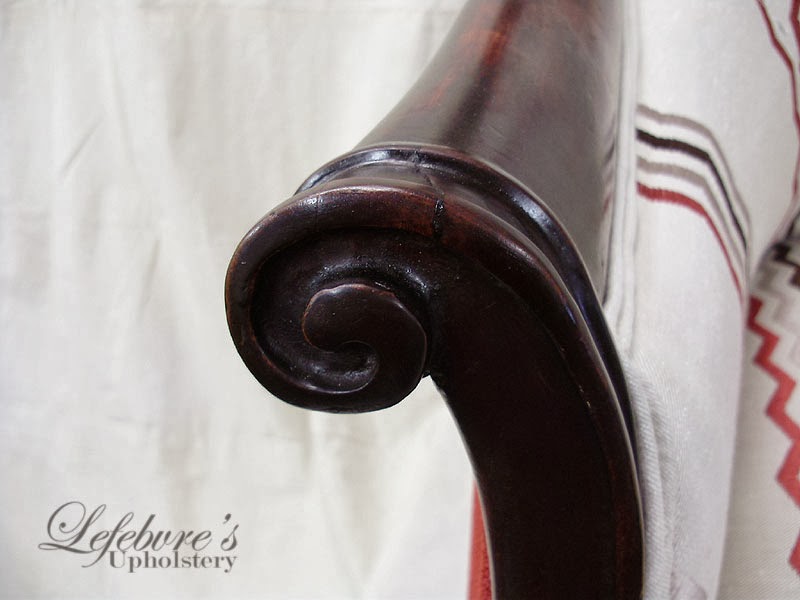
The repaired arms. The deep cracks are still a bit visible, but the chair had been repaired at least twice before, which made it very difficult to get a perfect clean joint (despite lots of hand carving and glue removal).


The bottom was finished in a black fabric using old fashioned tacks to keep the chair looking historic.
